Voiceover Recording Studio Checklist
Table of Contents
Not that long ago, voice actors who wanted to compete at a professional level needed to either record at an established studio or build their own; the latter being cost-prohibitive. Today, it’s easier than ever to build your own home recording studio for voiceover; hardware is more affordable and there is a wealth of options to choose from when it comes to software, both paid and free.
Whether you’re building a new studio or want to make sure your current setup has everything it should, this guide will help make sure you have everything you need.
What Do You Need to Build Your Own Voiceover Booth?
To achieve broadcast-quality audio recordings from your home studio (also referred to as a “project studio”) you need five things:
- Good acoustic environment
- Computer or laptop
- Recording software
- Professional microphone
- Audio interface
- Good headphones or studio monitors
Let’s look at these in more detail.
1. Good acoustics
The most important thing you need for a voiceover recording studio is a quiet space.
For voiceover, you don’t need a sound-proof environment but you do need your room to be acoustically treated.
This can be achieved by using thick carpet on the floor, fabric-wrapped foam panels, or acoustic foam. Experiment with your space and see what works best. If aesthetics aren’t important, you can even use thick blankets or anything that will absorb sound and reduce sound wave reflections.
As much as possible, avoid 90 degree corners because these can create pockets where sound waves gather and build up, causing a “boomy” sound. You can break these up by placing absorptive material in the corners.
Some voice talent find using a portable sound shield like the sE Electronics Reflexion Filter Pro can help, as an extra measure.
2. Computer or laptop with a quiet fan
Once you’ve established a quiet recording space, you need to set up the hardware. The first item in the chain is a good computer. It can be a desktop computer or a laptop – that choice really comes down to preference, what you’re currently working with, or what you can afford to buy. If you’re trying not to spend too much, remember that Apple sells refurbished computers, and you can also check out Facebook Marketplace, local computer repair shops, or kijiji.
Consider these three things when deciding on a computer:
- Is it fast enough?
- How many USB ports does it have?
- Can you hear the fan when it’s running?
Some people opt to have the actual computer in the next room and connect it to a monitor, keyboard and mouse in the studio, so that the fan isn’t running in the same room as the microphone.
3. Recording software
There are many choices when it comes to software for recording and editing voiceover. These are sometimes called “digital audio workstations” or DAWs, for short.
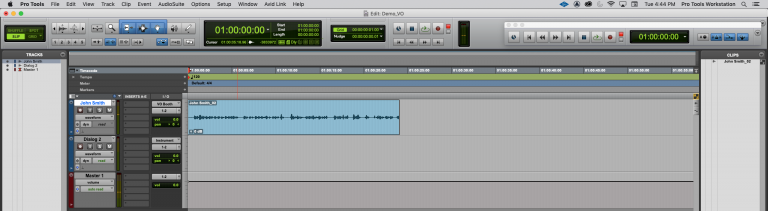
You can choose between free and paid versions. Professional studios will typically use Pro Tools but it can be costly and offers much more than you will need as a voice actor. For example, Pro Tools is used by studios for motion picture scoring, as well as for recording, mixing and mastering albums for bands. In both of those applications, the producers are working with multiple tracks. A voice actor really just needs one track to record, a second track for faster editing, and potentially a third ‘master’ track. Most voice talent will use just one track.
Free software includes Adobe Audition, Audacity, TwistedWave, and Reaper.
It’s important to note that no matter which software you use, the sound quality will be the same.
4. Professional microphone
For your audio to be considered good enough for use in TV commercials, radio spots, online advertisements, explainer videos, eLearning modules, and any medium that requires broadcast-quality audio, you’ll need to use a high-quality microphone.
This doesn’t mean you need to break the bank, there are very good microphones available for a few hundred dollars such as the Rode NT2-A,
If you have a healthy budget, you could spend several thousand dollars on a microphone like the Neumann U 87 or the Sennheiser MKH 416.
5. Audio interface
Professional microphones like the ones listed above don’t have a USB connection and won’t plug directly into your computer. You’ll need what is known as an ‘audio interface’.
What is an audio interface, and what does it do?
An audio interface essentially does three things:
- Receives the microphone’s XLR connection
- Converts the signal from analog to digital
- Boosts the volume using a built-in preamp
To give you an idea of why this is important, an XLR microphone running through an interface with a good preamp is the difference between a crummy recording done by someone using their phone or laptop’s microphone vs. a silky smooth voiceover you’d hear on a major market commercial.
Different types of audio interfaces include the Audient iD14, Apollo Twin MkII, and Focusrite Scarlett 2i2. These all plug into your computer with a standard USB connection.
6. Good headphones or studio monitors
The more pocket-friendly option is certainly headphones, and arguably you can hear as much or more detail when editing than you can with monitors. Headphones commonly found in professional studios are AKG K 240, Beyerdynamic DT 770 PRO, and Sony MDR7506,
Are studio monitors the same as speakers?
No, studio monitors and speakers are not the same. The difference between studio monitors and speakers is that monitors are designed to offer a ‘flat frequency response’. This is a fancy way of saying that they don’t boost the bass or add treble like your stereo monitors might do.
Imagine this scenario, you’ve recorded some voiceover and now it’s time to edit. When you play it back on your stereo speakers, it sounds booming and bass heavy. It would make sense to EQ it, or in plain speak ‘adjust it’ to remove the excessive bass sound but what if the voiceover itself is actually fine but your speakers are coloring it? Well, let’s say you send your adjusted (EQ’d) voiceover recording to a studio and the producer there listens to it on good-quality monitors. The producer is going to hear a very thin voiceover that’s missing some of the low end frequencies… because you took them away while you were editing. In essence, your speakers lied to you. Studio monitors would have saved you from that scenario because they would have played back the recording as true to the original recording as possible.
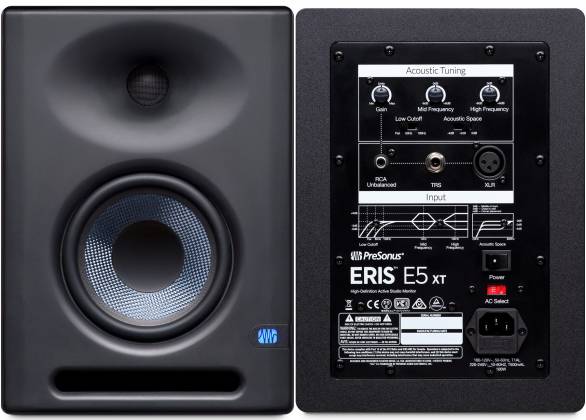
There are many different monitors to choose from. Consider the size of your studio and how much you’re willing to pay when choosing the right pair. Some excellent choices are Presonus E5 XT, Yorkville YSM5, Mackie MR524, and Yamaha HS5.
When mounting monitors in your studio, be sure to position them correctly.
In Conclusion
It doesn’t have to be difficult or expensive to set up a recording studio for voiceover. Have fun with the process and make sure you create a space you’ll enjoy working in. You might find that over time you have money to invest in a more expensive microphone or preamp; both of which will help you achieve an even warmer and more professional sound.
If you’d like more information about the voiceover business, check out The 5 Step Guide: How to Become a Professional Voice Actor
James Dooley is the owner of Dooley Media Works, a voiceover recording and video production company. When he’s not being the “friendly, yet authoritative” voice of brands like KAYAK, Dove Soap and Honey Nut Cheerios, he provides voiceover coaching and professional voiceover demo production for aspiring voice actors looking to succeed in the business.